Archive for category A-Z Edibles
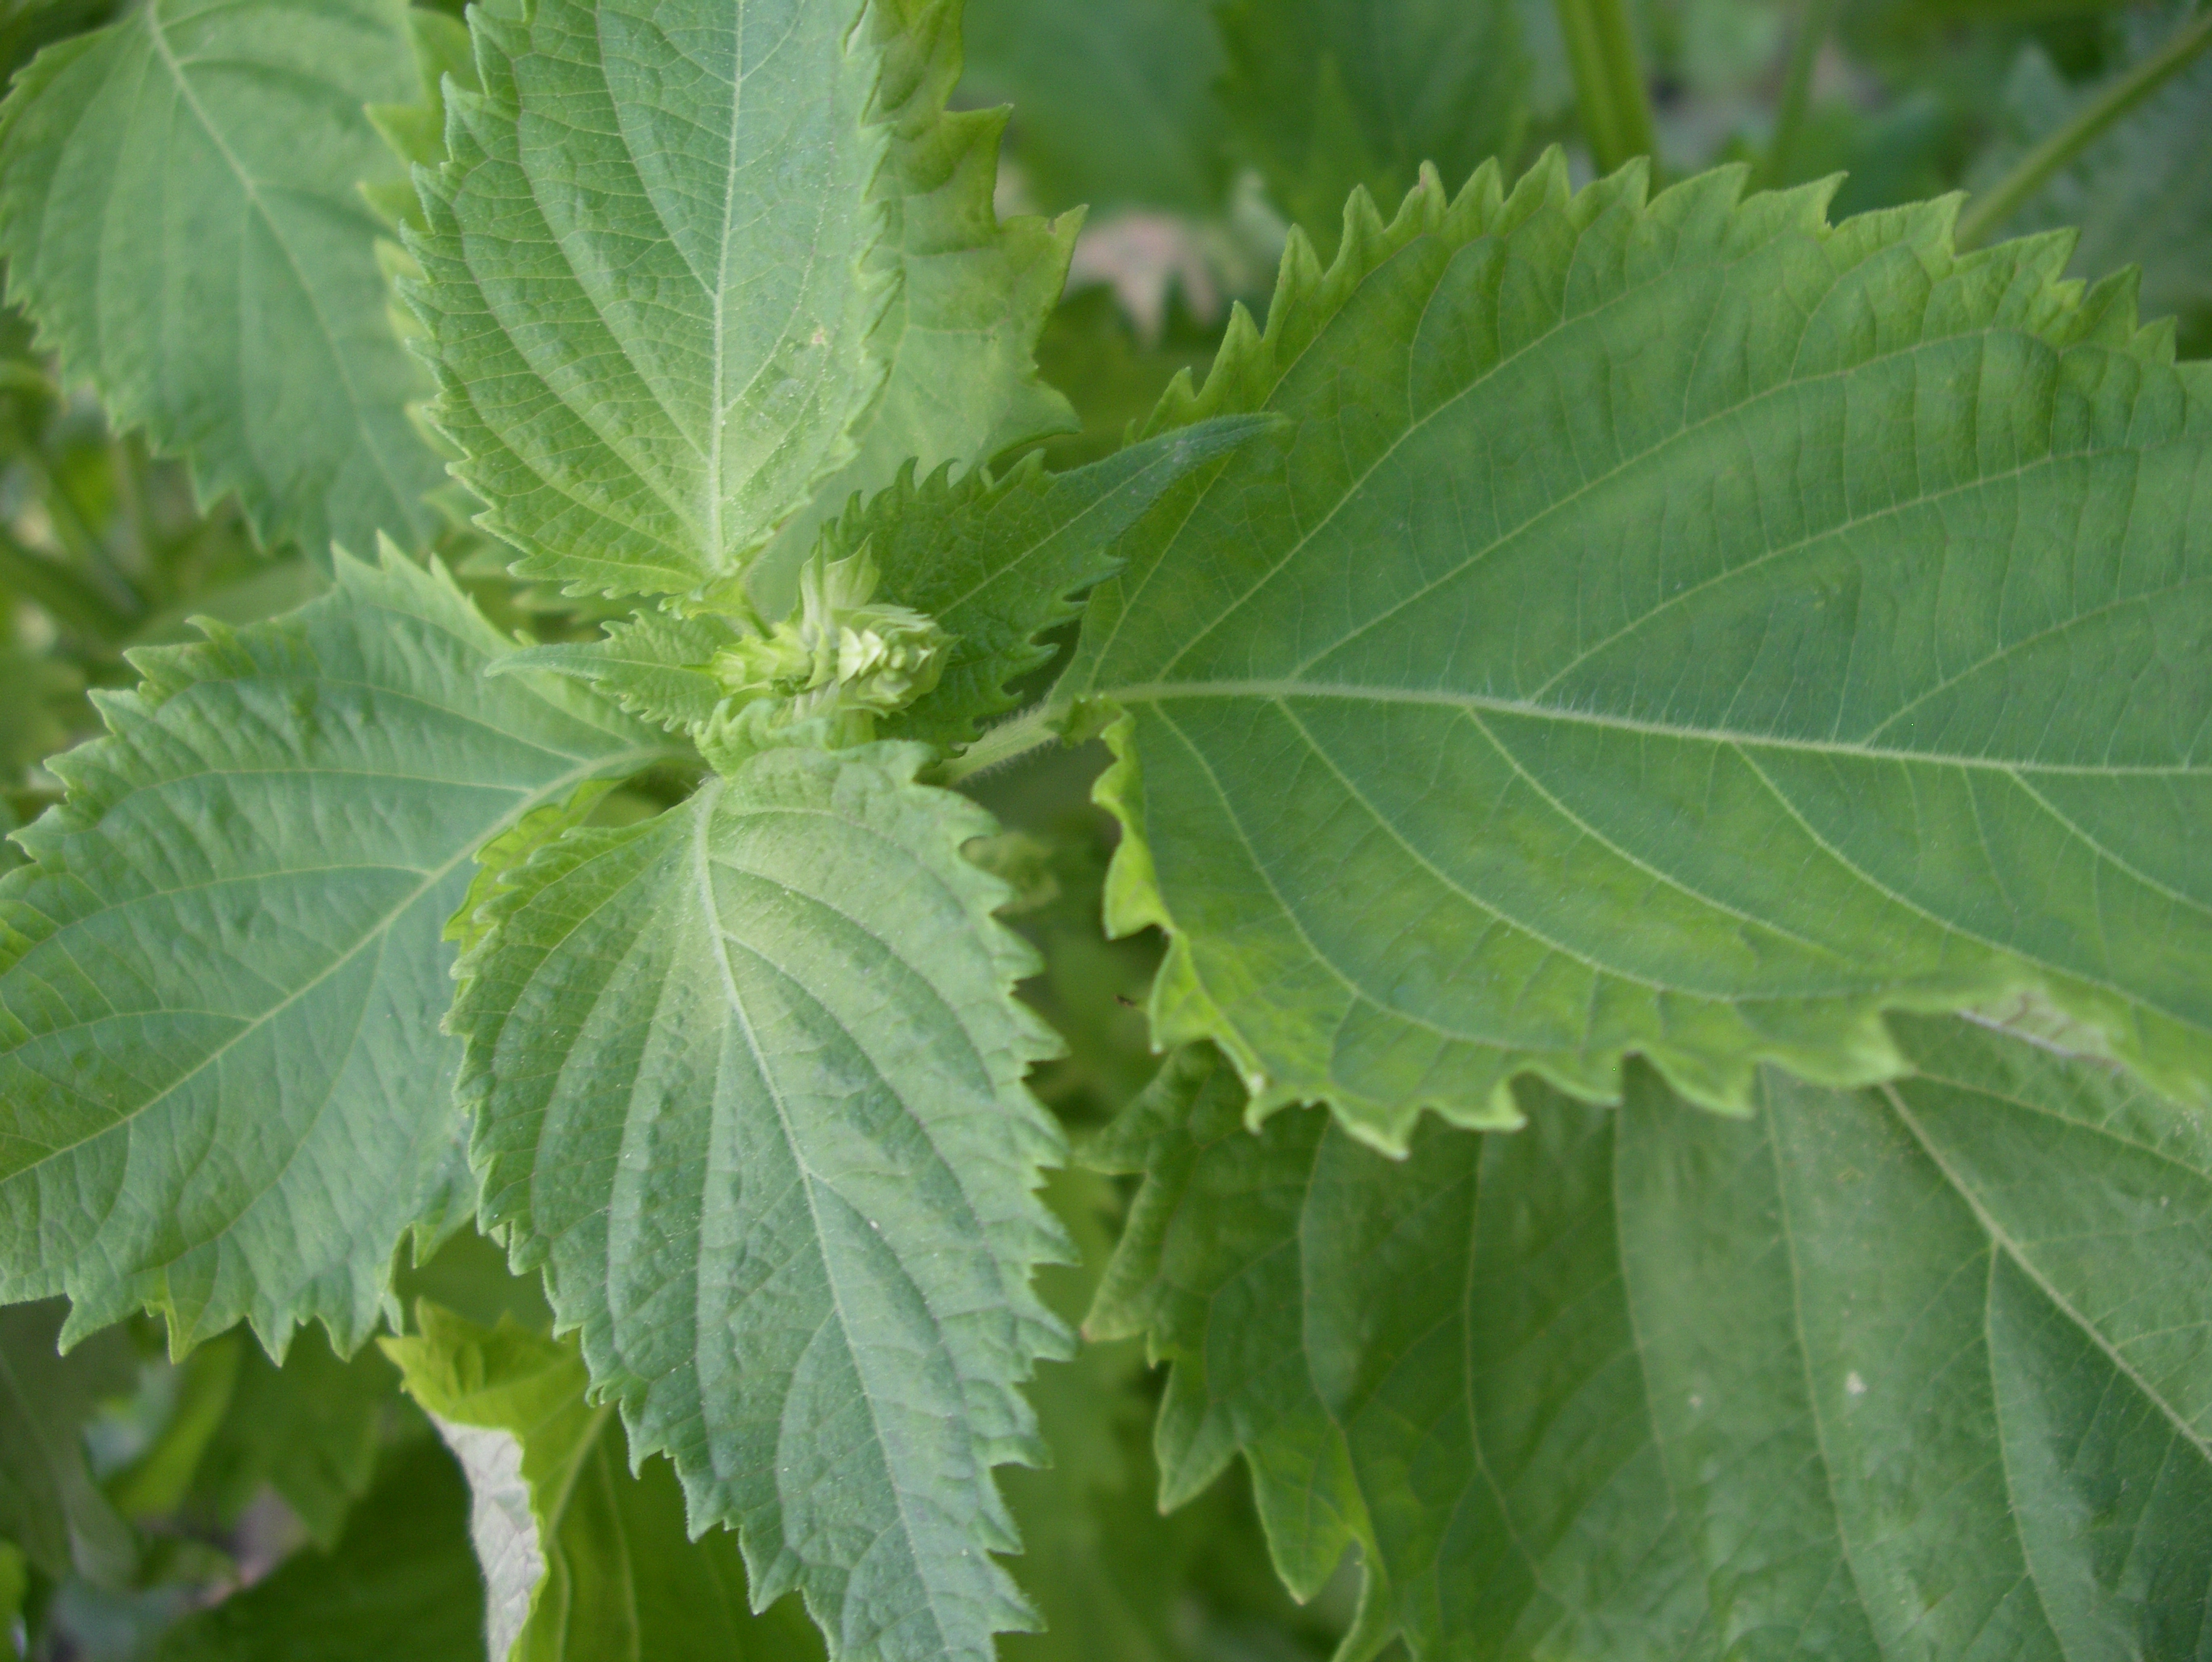
Perilla (Shiso)
Posted by Laura Hudson in A-Z Edibles, Herbs, Leaves & Salad, Perennials & Self-seeders on June 2, 2013
Family Lamiaceae: (Perilla frutescens var crispa)
Tender Self-Seeding leafy herb
Also known as Shiso or beefsteak plant. Perilla is a member of the Lamiaceae family, which includes many strong aromatic herbs including; mint, basil, rosemary, lavender, Melissa, marjoram and sage. This tender bushy herb is grown for its aromatic leaves, flower buds and seeds. Used extensively in East Asia as a vegetable and as a herb it makes a great addition to a kitchen or herb garden.
History The plant is native to South East and East Asia.
Site & Soil Warm, light well-drained soil. Prefers acid soils of PH 5.5 -6. Seems to grow on any soil and does not require rich soil. Best grown in full sun or partial shade in mild climates. Perilla will happily grow in pots and borders. In warm temperate climates perilla will freely self-seed and can be invasive.
Propagation Seeds require light to germinate and should have no or little covering of soil when sowing, but keep soil moist during the germination. To increase prospects of germination soak seeds overnight before sowing. Sow in situ or in trays at 15-20°C 30-40 days before last frost and plant out when all risk of frost has passed.
Sow (March) April-June Spacing 30cm apart Harvest All summer

Giant Leaf Korean Shiso Seed
Care The growing points can be nipped out to keep the plants sturdy. Warm temperatures, long day length and adequate moisture are required for good vegetative growth, and short days for flower production.
Spread Stands around 3ft tall.
Harvest The flavour is best when the leaves are picked about 5cm wide.
Storage Store fresh in a salad chiller for several days. Leaves can be pickled or dried for longer storage.
Botany and Seed Saving Plants are propagated by seed they flower and seed in late summer-autumn viability of seed is reduced after one year at room temperature but can be kept longer if kept under 5c. Some sources state that the seed can lie dormant for 1-2 years but that a period of 1-2 months in cold will re-activate the seeds, which might explain why it self-seeds so well, the seeds are happy to survive cold winters to germinate the following spring.
Use Leaves are often served whole as decoration and are to be eaten wrapped around raw fish or cooked foods on the plate. Fresh leaves can be used to wrap meats or stuffing mixes into parcels or rolls before cooking. The leaves are often shredded and served in salads with cucumber, cabbage or radish or as garnishes or flavouring for beef, eggs, potatoes, rice etc. The leaves can be used as a vegetable; braised or fried in oil with garlic or ginger in a wok or added to soups, they are also battered and served Tempura style then added to soups. Shiso leaves are a principal ingredient in shiso maki (rice and perilla wrapped in seaweed). The seeds can be salted and pickled and are ground, often added to the famous seven spices of Japan, Shichimi. The red varieties are used as colouring and for flavouring pickles such as sour plums and ginger. Leaves can be pickled by steaming for 10 minutes then covering in a mixture of soy sauce and vinegar. Leaves are also dried and sprinkled on rice. Miniature seedlings (sprouted seeds) can be used as a tasty garnish or micro green.
Recipes Pork Shiso Parcels
Other Properties has anti-inflammatory properties and is thought to help preserve and sterilize other foods.
Varieties Botanist consider the red and green types to be different. Red Shiso akajiso in Japanese is used to dye umeboshi pickled plums. While the green shiso aojiso is the stronger flavoured of the two Korean Shiso is distinct from Japanese perilla the leaf appearance is different larger, rounder, flatter, with a less serrated edge, and often a violet coloring on the reverse side and the flavour is more reminiscent of apples and mint
My Growing Notes Freely self-seeds and does better than Basil in a hot or shady garden. I have not yet grown Perilla in England but I am about to sow some seeds so I would love to hear from anyone who has grown it in the UK.
Reference http://web.archive.org/web/20030608171945/http://www.crop.cri.nz/psp/broadshe/perilla.htm
http://www.hort.purdue.edu/newcrop/proceedings1993/V2-322.html#Volatile%20Oil
Brenner, D.M. 1993. Perilla: Botany, uses and genetic resources. p. 322-328. In: J. Janick and J.E. Simon (eds.), New crops. Wiley, New York.
Posted by Laura Hudson in Cooking Greens, Leaves & Salad, Salad Leaf on May 31, 2013
An update to my growing notes on Agretti. This looks most appetising and I am starting to wonder if the variety I grew was more related to its genetic relative tumbleweed than this succulent looking variety. I saw this for sale just a few days ago in a market in Bologna, Italy. So harvest time must be late spring. Unfortuntely the variety name is cut short by the camera – could it be Gostrani, bostrani, Sostrani?

Agretti For Sale in Bologna, Italy
Agretti (Salsola soda)
Posted by Laura Hudson in A-Z Edibles, Cooking Greens, Leaves & Salad, Useful Plants on August 1, 2012
Family: Amaranthaceae Subfamily: Chenopodiaceae

Agretti, also known as Salsola Soda, Liscari, Barilla (Spanish) and Barba di Frate, Roscano or Agretto (Italian). A Mediterranean vegetable with thin succulent needle like leaves that grow on small bushy plants and is used mainly in Umbria and Lazio in pasta, seafood and fish dishes [1].
History Salsola soda is native in Eurasia and North Africa. Historically, it was well-known in Italy, Sicily, and Spain. In modern Europe, it is also found on the Atlantic coasts of France and Portugal and on the Black Sea coast [2]
Site & Soil It is a halophyte (a salt-tolerant plant) that typically grows in coastal regions and can be irrigated with salt water.
Temperature Min °C
Sow ? Feb-March Sept-Oct
Plant out ? April
Spacing 30-45cm apart
Crops in: 50 days
Harvest June-July
Seed Life 1-2 years
Germination 7-10 days
Propagation I sowed ia 1/4 tray in February and planted out in April.
Direct Sow 1cm deep spaced 10-15cm apart thin to 20-30cm apart. Some sources say this plant is not a summer green and should be started early indoors or in Autumn. In hot areas I would tend to agree with that as it gets woody quickly in dry conditions.
Care Keep weed free generally seems to be pest free
Harvest Salsola soda is harvested in bunches when small, or cropped regularly to encourage new growth when mature. Start cutting from the plants when they are about 6-8 inches tall. Cut the green tops or sections of the plant; it then will regrow

Botany and Seed Saving Franchi say agretti never has more than 50% germination due to the nature of the seed and its volatility. Wiki says the seed is notorious for poor germination at about 30% to 40% standard. The seeds I had were over 80%.
Use The plant has great historical importance as a source of soda ash, which was extracted from the ashes of Salsola soda and other saltwort plants. Soda ash is one of the alkali substances that are crucial in glass and soap making. Salsola soda has also been studied as a “biodesalinating companion plant” for crops such as tomatoes and peppers when they are grown in saline soils. The Salsola soda extracts enough sodium from the soil to improve the growth of the crop plant, and better crop yields result despite the competition of the two plants for the remaining minerals from the soil. [3]
Nutrition/Cooking Rich in vitamins & minerals. Best lightly boiled until the leaves soften but retain a little crunch, and eaten as a leafy vegetable or salad ingredient or garnish (much like Samphire). It can also be eaten raw or braised in olive oil. The flavour is grassy, salty and slightly sour and works well with seafood.
My Growing Notes
 Agretti has been billed as a gourmet delicacy in Italy and in Japan, but, in truth, I didn’t really warm to this plant as a food stuff. It took a long time to develop and when it did I didn’t really like it. It had needle thin succulent type leaves on stems that became woody. It has a slightly acidic grassy taste with not much going for it at all. It is not hugely different in taste or texture to purslane but purslane is far superior in my opinion with a much better taste and crunchier, juicier texture.
I must admit I did not give it a fair go, as far as the kitchen is concerned, I did not even attempt to cook it. I munched on it as I went round the garden but, well it just didn’t inspire me to pick any and take it back to the kitchen. I could imagine using it in a late winter – early spring salad but in summer in Southern France there are too many other delicious contenders that would beat it hands down. So guiltily, knowing I hadn’t given it a fair shot, I put it out of its, and my, misery and pulled up the 6 plants and slung them on the compost heap.
I may yet give it another shot and try again and see how it crops in England, particularly in a warm wet and maritime climate like we have here in Devon. I would still like to try cooking it Japanese style or pickling it in soy or something like that. One thing for sure is that the leaves need to be used when young, 4 months after setting out and the stems were really too woody to use. This picture of the plant in early July is when, on hindsight it probably should have been picked, but it just seemed so small and hardly a mouthful
Some cultivation notes
The only cultivation information I had for it was ‘this plant is not a summer green and should be started early indoors or in Autumn’ from wiki or ‘plant as soon as ground can be worked’ from Seeds of Italy. I started mine late February and set out early April but it hardly grew until mid summer, when the heat seemed to trigger it into action. I think Colin, who I got the seeds from, had the same issue with slow growth. Here’s a link to a picture of his agretti growing Colin’s Agretti Seedlings. I am not sure how Lieven got on.
Germination was actually very good near 100% not the 30% to 40% as suggested by wikipedia
Matures 50 or so days according to Seeds of Italy definitely not the case in my garden.
Info Contributed by readers
Dimitris Makris wrote: My name is Dimitris and I live in Crete. The name of Agretti here in Greece is “almira” which means salty. It’ s my favorite salad, you have to pick it up early when it’s tender avoiding the woody leaves. In Greece we cut the tender stems about 12 cm not the main stem and it grows again… how we make it as a salad here in Greece: just boil them (not much) put them on a plate and then add olive oil and lemon juice or vinegar and you’ll have the best salad for fishes or anything fried…
I also want to inform you that there is an interesting site about seeds exchange with no money here in Greece: http://www.peliti.gr.
Hairy Cucumber, Bari
Posted by Laura Hudson in A-Z Edibles, Cucurbits, Seed Saving on June 30, 2012

This wonderful fuzzy little ‘cucumber’ was one of the delights of my kitchen garden this summer. A smallish plump light green fruit with a furry or ‘downy’ skin and sweetish crisp flesh. The natural habit of the plants is to trail but it can be tied to grow over a climbing frame. Quick to crop, in around 60 days, they are also prolific and it seems the more they are picked the more cucumbers the plants produce. Most importantly they are absolutely delicious and do not get bitter even in extreme dry heat. I don’t think a meal has gone by, since they started cropping in early June, without them. Bari cucumbers are actually smooth skinned, the fur just rubs off.

Kate from Hills & Plains & Seedsavers in Australia brought the seeds over with her last Autumn on her French visit and entrusted me with some of these heirloom beauties. Kate came by the seeds because the Radogna family of Bari, who had been growing this cucumber in Italy as Caroselli Baresi, brought seeds with them to Australia. One of the family, Silvio, who has been growing them for over 30 years in Australia passed some of the seeds on to Kate because he wanted to make sure that the seeds would be kept going and the cucumbers would be grown by other gardeners. Read Kate’s story of her encounter with Silvio and his cucumbers
I was so impressed with these heirloom cucs that I started doing some research to find out more about them and discovered a whole family I didn’t know about, the Italian carosello type, a smallish fruit with a fuzzy skin and crisp flesh grown and eaten as a cucumber but botanically a melon, Cucumis Melo. If these Bari cucumbers are Italian carosello type, Cucumis Melo, I do have a slight problem with my seed saving plan this year because Melons cross easily. I had planned to save the seeds of these Bari cucumbers not least because I promised Kate, so I planted only one cucumber, the Bari, in the potager believing it to be Cucumis Sativus but I have also planted melons in the potager, so if the bari is a melon they could cross. The melons are not yet flowering so I have time to pull them out to make sure the Bari do not cross with them. I’d gladly sacrifice melons for these little beauties. I have planted Armenian Cucumber in the polytunnel which is Cucumis Melo so I can only hope that the barrier of the polytunnel will have cut down the chances of crossing sufficiently not to endanger the Bari seed. If anyone can confirm which botanical family these Bari cucumbers belong to I’d much appreciate it.
Flower Hairy Cucumber (Bari)


The fur just rubs off in you hand or under the tap.

Left to grow on for seed
As they grow and get larger the characteristics become more melon-like, the flesh, although not sweet has a more melon like flavour, the fur is thinner or possibly the same amount of fur shared over a larger area.
Research
Research paper A published paper on the varieties of Cucumber Melons still growing in Southern Italy. There are a number of ‘cucumbers’ from Southern Italy and from Puglia in particular that appear similar in that they have fury skin and are small.
I have found similar cucumber melons at a number of seed sources as follows.
Cucumber Barese from Grow Italian Described as: Light green, oval cucumber/melon from bari. White flesh. 4 inches long. Mild tasting and very productive. 70 or so days. Typical ‘downy’ skin of this type.
Cucumber Carosello Barese from Mail Order Garden Heirloom Cucumber Barese Seeds from Bari produce a Light green oval melon type cucumber with White flesh mild taste and very productive.
Carosello Barese from Gourmet Seeds Described as: Extremely tasty and very mild heirloom. Texture and flavor are very nice. Similar to Mandurian round cucumbers. Has no spines as a normal cucumber but light peach fuzz, as it is truly a member of the melon family with no bitterness or ‘burps’. When harvested young (as pictured), slice and use whole as you would a cucumber. If allowed to grow, it will begin to show ribbing and develop a thin skin, and the flavor will shift to a that of a mildly sweet melon. A wonderful ‘cucumber’, a best seller, and a huge hit on any table and a great novelty at market.
Carosello Mezzo Lungo and other armenian cucumbers, carosellos and pickling melons from Solan Seeds
Original post from Mas du Diable August 8, 2009 updated July 2012
Planting Tomatoes
Posted by Laura Hudson in A-Z Edibles, Cultivation, Manual, Seasonal tasks, Soil Fertility, Solanum, Tomatoes on May 15, 2012
Tomatoes are one of my favourite foods so I grow as many as I can fit in my garden and choose varieties for their flavour, use and season and I make sure of a good crop by really taking care of them. As with most plants if you give them a good start and the best growing conditions you will be rewarded with better crops and stronger plants that need less care in the long run.

Choosing Tomato varieties
My favourite eating tomato is still Noir de Crimee, a black Russian heirloom; odd shape, odd colour but fantastic taste. Cherry tomatoes are a must for me as they are great to graze on while pottering around the garden. Next I make sure I have plenty of tomatoes for preserving, some varieties being better than others, the best I’ve tried so far are San Marzano and Roma for paste and sauces see the page on best preserving tomatoes. The other thing to consider is the length of the season. Some tomatoes bear fruit more quickly than others and are normally described by the number of days from planting out to first fruit ripening i.e. Early 55-70 days, Mid-Season 70-85 days and Late beyond 85 days. Next is variety of flavour and colour which makes for wonderful mixed tomato salads so it is nice to grow a few mild white tomatoes, acidic green ones and puunchy orange ones.

The first thing about tomatoes is that they need plenty of nutrients to produce all those lovely fruits, but the nutrients need to be added as they grow, if you put too much in at the beginning they are more likely to have too much leaf growth at the expense of fruit.

Soil Preparation
Tomatoes need a constant medium level of moisture. Too dry, too wet or too much fluctuation often causes blossom end rot resulting in unusable tom
")
atoes. Prepare the soil where the tomatoes are to be grown either by preparing planting holes, troughs or the entire bed. I prefer to prepare troughs as this helps to direct the most nutrients and moisture to the roots and it makes it easier to water when needed. Dig a long ditch 2 spades deep and 1 spade wide. Put a layer of chopped comfrey leaves on the bottom and half fill with a mixture of well rotten compost and manure 9 parts compost to one part manure and water heavily to fill the trough.

Planting depth
Plant the tomatoes in the bottom of the trough, as deep as you can, right up to the first set of true leaves, remove the remaining baby leaves. Roots will grow from th

e stalks giving the plant more stability and ability to draw more moisture and nutrients from the soil cover with dry soil but leave sides to the trough. This will help protect the young plants from wind and help direct water to the plants.
Spacing and Staking
Tomatoes need a fare bit of space as they don’t like to be crowded. It depends on how you plan to grow the tomatoes as to what distance apart they should by anything from 40-75cm apart works. I normally set out at around 50cm apart and grow them as cordons, that is straight up a pole with one main stem or sometimes two depending on how vigorous the variety. Cordon tomatoes need to be staked, I use 2 meter metal, chestnut, or cane poles with a cross brace on windy sites. Tie in the plants as they grow so that the tops are firmly but gently attached to the poles.
Top Dressing
Once the tomatoes are in place add a top dressing of organic soil enhancer such as seaweed meal or well rotted manure. The dressing will gradually be brought down into the soil by water and the soluble nutrients can then be drawn up by the plant as it grows.
Mulch
Applying a mulch, a top cover, over the ground around the tomatoes will help protect the soil and plants and conserve the moisture level in the soil. For more details on mulching read Using Mulches
Pinching out
Intermediate tomatoes have a habit of growing into bushes which produce a lot of leaf and plant growth but less fruit. In order to concentrate the plants energy on the fruit it helps to pinch out the side shoots. That is the little sprouts that form between the main stems and a leaf branch. Pinch these out with your fingers when they are less than 12cm. If you have missed a few and they have got bigger cut them off with clippers or a knife so as not to tear the plant.
Liquid Feed
Tomatoes benefit from a liquid feed, applied every 2 weeks, once the fruit start to form. You can buy ready made preparations but why not make you own. For more details on liquid feeds read Making Organic Liquid Fertilisers
Gardener’s Tip
Russian Comfrey is one of the most versatile plants for the organic kitchen gardener as it is a fantastic natural source of potash-rich organic material and liquid feed. It’s many uses include; compost activator, liquid feed, potting mix, soil enhancer, mulch and bee attractant.
The real value of comfrey lies in its composition. The roots bring up potassium, phosphate and other minerals from deep in the ground to the leaves which are also high in nitrogen. Comfrey has 2-3 times more potassium than animal manure, which makes it especially good for the production of flowers, fruits and seeds.
Beware Russian Comfrey (Symphytum x uplandicum) is quite a different plant from Wild Comfrey. (Symphytum asperum). Russian Comfrey is a hybrid and is sterile so does not freely seed. Wild Comfrey seeds madly and can be a real nuisance, we had some growing in our garden in England and I could not get rid of it.
Growing Sprouting Seed
Posted by Laura Hudson in A-Z Edibles, Cultivation, Leaves & Salad, Manual on April 27, 2012
If you haven’t got a garden, or the time to wait for salad crops to mature in the ground, or despite your best efforts your lettuces have succumbed to a scorching summer, hungry wildlife or your summer holiday away; sprouting seeds will fill the gap.

Sprouted seeds are packed full of energy, are highly nutritious and are very easy to grow in your own kitchen, you don’t even need a garden. They take only a few days and no special equipment to grow yet provide delicious, almost instant satisfaction, and dinner on the plate.
Seeds are just plants waiting to happen, dry they are in a dormant state and only need to be filled with water to become a living entity. Seeds sprout fastest in a warm light airy place, out of direct sunlight, with an ambient temperature of 18-22 Celsius, which is pretty much the condition of most kitchens. All you need is a large glass jar with a screw top lid and water. You can use a purpose made sprouter, there are many inexpensive types available, or you can make your own by piercing the lid of a jam jar to make drainage holes or securing a square of muslin over the top of the jar with an elastic band.
Method
Firstly soak the seeds in a large jar filled with cool water, as directed for each seed type. Empty out the water and flush with more fresh water to rinse then drain thoroughly. Rinse and drain the jar twice a day, until the seeds have sprouted and are ready to eat.You can decide for yourself at what stage you like them best, as soon as the seed has fattened up from its first soaking it can be eaten or it can be left to grow on until it has full size sprouts.
Storage
When the sprouted seeds are at their peak rinse, drain and empty into a paper lined plastic box or glass jar, seal and store in the lower part of a fridge. The temperature in the fridge will halt growth and the sprouts can be stored for several days in prime condition before being eaten.

What to sprout
Some of my favourite sprouted seeds are also the most commonly available to buy.
Alfalfa (Luzerne in French) Soak seeds for 4 hours. Alfalfa will be ready to eat in 3-7 days
Crisp sweet flavour like fresh peas, delicious raw in salads or sandwich fillings. Rich in amino acids which are very important for the metabolism and helps lower cholesterol. Rich in phosphorus, calcium, magnesium, and vitamins A, B1, C, D, E, K.
Mung Bean (Haricot mungo in French) Soak seeds for 12 hours will germinate ready to eat in 5-8 days. Delicious raw in rice noodle and oriental style soups & salads, stir fried or used as stuffing for spring rolls. These are the ‘beansprouts’ most commonly found in oriental shops and restaurants. Commercially they are hulled and grown in darkness and under weight pressure to achieve the dense white crisp sprouts we are familiar with.
Chick Peas (Pois chiches in French) Soak 4 tbsp peas for 8-12 hours ready to eat in 3-6 days
Lentils (Lentilles in French) Soak seeds for 8 hours will germinate ready to eat in 5-8 days
You can find seeds specifically for sprouting, from health food shops and some seed companies. You can also experiment with all manner of vegetable and herb seeds that can be sprouted and are delicious; including pumpkins, peas, sunflowers, broccoli, leeks, onions, and chives. For more information and inspiration on what and how to sprout visit Sprout People or Primal Seeds.
Originally Posted on Mas du Diable 16/8/2007:
Angelica
Posted by Laura Hudson in A-Z Edibles, Leaves & Salad, Useful Plants on April 27, 2012
Angelica Angelica archangelica or Archangelica officinalis is an umbelliferous plant and member of the Apiaceae family.

Archangelica officinalis
From December to April the fresh young leaves of Angelica are at their best. Angelica is a lovely herb that self-seeds and establishes itself easily. It is a fascinating and useful herb that has been in use since ancient times, for both medicine and food.
History
The name is said (1) to come from medieval Latin herba angelica, which means angelic herb, a name given to it because it was believed that the herb could protect against evil and cure all ills. Other sources (5) suggest the name comes from the Greek angelos meaning messenger because, according to legend, an angel visited a monk and told him the herb would cure his plague stricken village. Another source (6) claims it is named for the old saints day of Michael the Archangel, when it comes into flower. In older times the herb appears to have featured in pagan festivals and was dedicated to heathen gods. Whatever its folkloric or linguistic roots angelica was growing in a large clump in front of our house, perhaps to ward off evil spirits, when we first arrived here. Since then I have used Angelica’s self-seeding capacity to spread it to choice spots around the place so we now have a healthy and plentiful supply.
Description
The plant is a robust, aromatic biennial if left to self-seed or a short-lived perennial if the flower stalks are kept cut back. Plants are tall, the flower stalks reach 6ft, and need plenty of space. It has thick, hollow, ridged stems and long-stalked, deeply divided green leaves. Umbels of tiny green-white flowers appear in summer followed by ovate, dark, ridged seeds in late summer/autumn.
Growing Angelica Propagate from seed; collect seeds in autumn and sow directly where you want them to grow. You can also sow in modules to plant out later or wait until spring to sow direct. (NB I’ve read that angelica seeds (5) have a short life and that viability can start to decrease after about 3 months, I am not sure about that, I am not convinced that is so). Plants do need plenty of water and space, a deep rich soil and some shade in order to grow happily in the summer months. They self-seed easily so If you want to prevent spreading cut down the flower stalks before they set seed. Left to self-seed the new shoots appear in late winter.
Harvesting Harvest leaves before the plant flowers and use fresh or dry for use later. Here on our land the young leaves are at their best from late autumn to early spring. Harvest stems while they are young and still bright green and before the flowers appear. The seeds are best collected in the autumn when the weather is dry.
Culinary Use The fresh young leaves can be eaten raw in salads or lightly cooked as you would spinach, while the stems are traditionally candied and used in confectionary. Its aromatic flavours makes it a useful pot herb in late winter and early spring when not much in the way of fresh greens are available. The leaves are often stewed with tart fruits such as gooseberries and rhubarb, to counteract and sweeten the acidity of the fruit. Angelica is also used in the preparation of a number of liqueurs such as; Chartreuse and Bénédictine and sometimes in absinthe. Last spring I tried making Candied Angelica using a recipe from (5) but it really didn’t work. It was too sugary and the colour and flavour was lost in the lengthy cooking process required so if anyone has any tips on making Candied Angelica PLEASE do post your comments.
Garden Use An excellent variety to add to a perennial & self-sowing wild-life and edible hedgerow, along with Alexanders, Chervil, Korean Mint, Mustards, Chicories, Kales and Fennel.
Medicinal Use
I’ve been looking into the medicinal uses for Angelica because I had an awful cough that just would not shift, 3 months and counting, so I’ve been drinking Angelica tea as a remedy, it certainly has reduced the symptoms and is pleasant to drink. I thought it might be useful to post up the information I’ve gathered.
This information comes from a combination of the sources listed. I’ve included information only when two or more sources agree that Angelica is a good remedy for the specific properties and ailments listed.
Angelica has a soothing, warming, stimulating action on the digestion, lungs and circulation and is often counted as one of the bitter herbs used to make the gastric tonics often called bitters. Angelica contains chemical compounds that can relax and sooth the muscles of the windpipe and intestines and is said to be able to loosen phlegm in the lungs.
In particular Angelica can be used as a remedy for:
- respiratory complaints such as; bronchitis, asthma, pleurisy,catarrh
- colds, flu & chills
- digestive problems such as; indigestion, wind and heartburn
- poor circulation
- exhaustion and rheumatic pains (external)
- swellings, itching and rheumatism. (external)
Preparations
leaves, stems dried roots and seeds are used.
Infusion (tea) The fresh or dried leaves can be steeped in hot water to make Angelica tea.
Infusion (root tea) 1 tsp dried Angelica root is added to 1 cup boiling water and steeped 15 to 20 min. Take 1 spoonful 3-4 times a day
Decoction The dried roots or stems are mashed and boiled for 8-10 minutes then strained.
External use – add crushed leaves to a bath to relieve exhaustion and rheumatic pains.
Poultice – fresh leaves can be crushed and rubbed on skin areas for swellings, itching and rheumatism.
Reference Sources
1. A-Z of Natural Remedies by Amanda Sandeman
2. Off-The-Shelf Natural Health How to use Herbs and Nutrients to Stay Well by Mark Mayell
3. Herbs and Health Nicola Peterson
4. Encyclopedia of Herbs and their uses, by Deni Bown The Royal Horticultural society
5. The complete Book of Vegetables Herbs & Fruit Mathew Biggs, Jekka McVicar and Bow Flowerdew
6. The Country Diary Herbal Sarah Hollis
CAUTION
I think this is a herb to approach with caution because several sources provide a warning (4) that the fresh roots are poisonous, (5) large doses can paralyse or depress the central nervous system and Angelica tea is not recommended for those with diabetes as it can cause an increase of sugar in the urine. At one time large doses of Angelica were used to induce miscarriages so it is obviously a herb to use in moderation and with caution.
Pepper, Doux D’Espagne
Posted by Laura Hudson in Capsicum, Varieties on April 27, 2012

Capsicum Annuum Doux D’Espagne
A long, sweet pepper also known as Sweet Spanish Mammoth an heirloom, which dates back to 1859, according to Thomas Etty.
I first grew this pepper in 2006 and it did so well, providing huge crops of delicious sweet peppers, that I have grown it each year since. I usually grow 6-12 plants, because I make a lot of pepper preserves, but if I was just growing it for eating fresh I would probably only need 3 to 6 plants.
 Image Doux D’Espagne, green
So far it has seen off all competition, Big Banana an F1 that struggled to produce fruit in a dry season, Red Goats Horn (Corno di Torro) not nearly as meaty or tasty, and Buran nice but not much of a crop. Doux D’Espagne is my favourite by far and the sweet red pepper to measure others by. It really is outstanding, great in the kitchen and a prolific and reliable cropper. Green the fruit are delicious sweet and crisp with a hint of aniseed in the taste, once matured to red they are sweet and packed with flavour. They are delicious raw and make a wonderful Turkish Red Pepper Paste, or Roast Pepper Salad and contribute bulk to hot Harissa.
Image pepper growing in the lush foliage
The plants are robust and grow fairly tall, 3-5 foot depending on the season, with lots of mid to dark green foliage. The white flowers set green fruits that mature to red fairly early and crop until the first frost. The peppers are huge, 20cm long, 3 sided, tapered and smooth. The flesh is thick, crisp and juicy. A great all purpose sweet red pepper, I haven’t found anything to beat it yet, though I do still keep trying.
Overwintering
I have had success growing this variety as a perennial in my unheated polytunnel. It survived and cropped for three seasons before I had to remove the huge plant when the polytunnel had an overhaul and clean out in 2008.
Seed Source Original seed source was a French commercial seed company Gondian.
MDD Growing Log
2006 S:Feb 3 Set out 16 plants May 15, brilliant crop outdoors from early August, pest free. Block planted, mulched with straw they seemed to really like that
2007 S: March 26 Set out 6 plants May 20, excellent crop
2008 S: April 7 Set out 6 plants July 4, cropped ok but not enough time to mature and fully crop as in previous years
2009 S March 5. Pricked out 12 plants April 20. Set out 8 plants May 31. Great crop but would have benefitted from moving schedule forward 1 month as in 2006.
Original Seed Source Gondian
Note this is part of a series on favourite varieties ones that I will continue to grow, save seeds and hopefully produce enough seeds to share. Keeping a variety log is useful particularly if you want to save the seeds .
Endangered Seed Status
According to the Canadian Seeds of Diversity Heritage Plants Database this pepper is an endangered one as few seed companies carry it and it is not maintained in the US or Canadian gene bank. However I have found several companies that carry seeds: Thomas Etty-UK, Vilmorin-FR, Gondian-FR
Mas du Diabl;e Original Posted 7/2/2009
Chard or Leaf Beet
Posted by Laura Hudson in A-Z Edibles, Leaves & Salad on April 20, 2012
Chard or Swiss Chard, Beta vulgaris Cicla, is a member of the Chenopodiaceae family of plants. Known as poirée, bette or blette in France, it is a popular kitchen garden vegetable, although less known in the UK. Chard is an excellent leafy vegetable; an all-rounder, tough, reliable and productive throughout the year, making it an excellent choice for any kitchen garden. The leaves can be used like spinach and the ribs are a delicious vegetable in their own right, particularly the varieties with thick ribs.
Biennial Hardy Edible Leafy plant

Chard, Verte a Carde Blanche, April 2007
History The cultivation of chard dates back to classic antiquity. The Greeks and Romans used it widely but it did not become popular in Europe until the middle ages.
Site & Soil Swiss Chard is tough, tolerant of poor soils, shade, heat and temperatures down to –14c. It will grow best in a sunny site at 10-25c °C
Propagation Chard will produce all year from a single sowing, it can be succession sown through the year or my preference is to make 2 sowings per year one in late winter/early spring and one in late summer/early autumn. Improve germination by soaking seeds for 24hrs before sowing to break down the hard seed shell. Germinates 7-10days.
Sow (Feb) March-June and August-Sept (Oct) Crops Spring 60days Summer 45days
Spread 25cm x 45cm
Method
1. Sow in situ in drills 1-3cm deep, in rows 30cm apart. Thin, when the seedlings have 4-5 leaves, to 22cm apart
2. Sow undercover in cells and transplant after 4-6weeks
3. Sow 3-4 seeds in stations 20-25cm apart in rows 45cm apart
4. Broadcast sow in 10cm wide drills and treat as a CCA.
Harvest (April-May) May-Nov and Dec-April
It is in season for most of the year from early summer until mid to late spring the following year from an early spring sowing.Cut outer leaves just above ground level from several plants rather than completely stripping one. Continual cutting of outer leaves through the season ensures the production of new young tender leaves. Chard can be harvested at the baby leaf stage for use in salad or as a cooked vegetable either use the thinnings or treat as a cut and come again by cutting the small plants down to just above the soil surface.
Storage Pick as required or harvest and store leaves in a fridge for up to 1 week.
Botany and Seed Saving Retains 50% germination for 6 years. In mild winter climates the seed-to-seed method is used to produce seed in colder climates with frost killing winter the seed-to-root-to-seed method should be used. Thresh dried seed stalks and winnow to remove plant debris. Beet seeds have an unusual structure in that each seed is a group of flowers held together by their petals. These clusters usually contains 2-5 seeds. An outbreeding, wind-pollinated plant with pollen travel up to 5 miles. Minimum of 6 plants required for seed production.
Companion Swiss chard is said to grow well with carrots, cabbage, beans, radish and turnip/swede. I find it grows particularly well next to aubergines.
Use as you would spinach; young leaves raw in salads and older leaves and ribs as a pot herb or leafy green.
Nutrition Swiss Chard is rich in Iron and Vitamin A as well as a useful amounts of Vitamin B & C.
Varieties
Verte a Carde Blanche Classic French variety with thick white succulent midribs and tasty dark green leaves. Really delicious this is my all time favourite chard variety.
Bright Lights A swiss chard with a mix bright colourful stems and a mild, sweet flavour. It will overwinter to provide leaves during milder weather in winter and into spring.
Lucullus A swiss chard with thinner 2-3cm wide pale green to white ribs and light green crinkle edged leaves.
Zilver thick white ribs and green leaves i found it disappointing (i grew an organic variety from unwins).
Perpetual Spinach A long-standing easy to grow spinach like green, it is actually a slim stalked, smooth leaf swiss chard or leaf beet. It is quite hardy and prolific supplying a “perpetual” harvest of leaves throughout the year. It is much slower to bolt during the hot weather and long days of summer than true spinach. Maturity from fifty days onward.
Further Reading
Seed to Seed: Suzanne Ashworth, p71
Asparagus
Posted by Laura Hudson in A-Z Edibles, Perennials & Self-seeders on April 19, 2012
Asparagus, Asparagus Officinalis, a hardy perennial from the Liliaceae family. Asparagus is an ancient vegetable highly prized for its wonderful flavour as well as its nutritional and medicinal values, it produces tasty edible spears in mid spring. Asparagus may seem like a lot of work and a long wait to get started but once the plants have settled in and the asparagus bed has started producing it can’t be beaten, it really is worth taking the time and making the space for it.

History
Asparagus is believed to be a native of the Mediterranean lands but it has been found “wild” in so many places that there is some confusion as to where it actually originated. There are references to asparagus in ancient Egypt, Greece, Syria and Spain. It is known to have been cultivated by the Romans since at least 200 B.C. but it was not until the 16th century that it became popular in France and England. From there the early colonists took it to America.
Site & Soil
Asparagus is best in full sun in an open site but not too exposed to wind. It requires rich, (low nitrogen) well-drained, sandy soil and prefers a PH of between 6.5 – 7.5. Asparagus grows best at 16-24c but needs cool winters during its dormant period to crop well in spring. The natural habitat of Asparagus is maritime and it can be found growing wild in many seaside locations around the world. It thrives in soils that are too saline for many other plants and is an ideal plant for a seaside garden.
Preparation (asparagus trench)
Incorporate a good amount of manure before planting. (preferably in autumn leaving the soil rough until March). In March dig a trench 20cm deep and 30cm wide. If soil was not prepared beforehand incorporate manure and leaf mould. Shape soil at the bottom of the trench into a ridge 10cm high running the entire length of the trench and sprinkle with bone meal. Trials have shown that adding sheep manure, bone or wool to the very bottom of the trench ensures a slow release of nutrients over a long period and will benefit asparagus. We happened to have all of the above from the late sheep that roamed the mountain so they went into my trenches.
Propagation
- by division – divide roots in late winter or early spring when buds are just developing and before new root growth begins in earnest. Carefully lift crown with a fork. Shake off excess soil. Cut away any damaged or diseased growth from each section. Take great care not to damage or cut into any buds. Pries apart the crown into sections each with at least one good bud. If necessary gently cut through the Crown. Place crowns 60cm (some say 30-45cm) in a single bed or in beds with 2-3 rows 60-90cm apart. Lay crowns upon the prepared ridges spreading the roots down either side. Gently fill in the trench with sifted soil so that : only the buds are visible. Earth up as the asparagus grows to always keep the same amount of stem uncovered. By autumn the trench should be filled In warmer climates cover the bud tips with 5cm of loose soil to stop them drying out.
- by seed – Sow seeds in a seed bed 2.5cm deep and 8cm apart in rows 30cm apart. Transplant the largest as crowns to their permanent position the following spring (see above). Alternatively sow in modules in late winter – early spring (13-16c) and transplant in early summer ready to harvest after 2 years. TIP Soak seeds 2 days before sowing.

Planting Asparagus Crowns
Care
An asparagus bed will provide spears for 15-30 years if well maintained so it is worth taking care of your beds. The roots store the energy produced by ferny stems during the growing season. Once harvested Asparagus should be left to grow ferns and be kept weeded, watered and fed so that a fresh crop of spears can be produced next year. Keep asparagus beds weed free and moist. Do not let the beds dry out or get water-logged. After spring harvesting apply a general fertiliser or seaweed based meal to nurture stem growth and build up plants for the following year. In autumn cut down the ferny stems once they have turned yellow (burn to avoid harbouring asparagus beetle eggs). Stumps should be left 3-4cm proud. Apply a heavy top-dressing of well-rotted manure in Autumn to late winter or cover beds in seaweed. Remove in spring if the seaweed has not rotted down. Feed again with fish meal, chicken dung, seaweed and add a sprinkling of salt in Spring.

Asparagus Ferns
Harvest
It will normally take 3 years to crop from seed, but crowns can be bought at 1 or 2 years old which will crop in 1-2 years. Asparagus is ready to harvest once the spears reach 10-17cm long. Cut them obliquely about 2.5-5cm below the surface with a sharp knife or serrated asparagus blade. Harvest period is 6- 8weeks but do not harvest after midsummer as this will result in weaker spears next year. Our Asparagus season starts with the first spears in the first week of April and continues through to mid May at which point I stop cutting the spears to allow the plants time to grow a last flush of spears that will turn into ferns.
Storage & Culinary
Asparagus is such a delicious vegetable that when it arrives you just want to eat it as fresh as possible. It is said that the water should be put on to boil before cutting the asparagus, so that the fresh spears can be dropped straight into the boiling water. Asparagus is also delicious stir fried, grilled over hot coals, in salads or made into a light soup. In ancient times asparagus was dried to be eaten over the winter nowadays we can freeze it.
Nutrition
Asparagus is a wonder plant nutritionally. It is high in Folic Acid and is a good source of potassium, fiber, vitamin B6, vitamins A and C, and thiamin. It is the best vegetable provider of folic acid, necessary for blood cell formation and growth, as well as liver disease prevention. Asparagus has no Fat, contains no Cholesterol, is low in Sodium and is low in calories, each spear contains less than 4.
Companion
Asparagus grows well with Tomatoes, Parsley and Basil. I have found that growing New Zealand Spinach between the raised beds works well by allowing it to creep over the beds it helps retain moisture in the beds during the hot summer months. The light shade cast by asparagus ferns in the summer months could also be used to benefit other plants such as lettuces and spinach which struggle in the heat.
MDD Growing log
When we arrived at Mas du Diable in early winter I discovered a few straggly asparagus ferns growing in the orchard. I thought they were wild asparagus but it turned out these plants were the remains of an asparagus bed that had been planted around 15 years before. After resuscitating the old crowns we still needed more so the plan is to grow the rest from seed and aim for a bed of at least 30 crowns.
2004 In spring I dug the asparagus up just as the buds were emerging, dividing it carefully into 10 crowns and started our first asparagus bed in the veg patch. I left all the spears without cutting to turn into ferns. By autumn the ferns looked healthier than they had, abandoned in the orchard, but definitely needed beefing up. The beds were top dressed with seaweed meal and compost.
2005 Each of the found crowns produced perhaps 5 or sow thin spears which we cut to eat until the beginning of June then left the plant to grow ferns. The ferns looked big and strong and an improvement on the previous year.
2006 We sowed Jersey Knight Improved (10 seeds from T&M) individually in pots in a heated propagator in January, 6 germinated. I set out the plants in a protected seed-bed, uncovered cold frame, in April where they grew well. Meanwhile the found crowns provided a decent harvest and have produced huge ferns which I hope means a better still crop next year.
2007 I have another more generous packed of Argenteuil (350 seeds from Franchi) to try which i plan to sow 1/4 in January and then again in March as the seed packet recommends March to the end of June.
2008 The beds are now well established and produce a good crop sometimes as early as February and I always follow the rule of not cutting beyond the summer solstice.
-
You are currently browsing the archives for the A-Z Edibles category.

Welcome to Kitchen Garden Notebook (Mas du Diable). It is no longer an active blog but rather an information resource for growing all things edible or useful. It is important that we all know how to grow food and how to save the seeds of edible and useful plants for the future. Laura HudsonKitchen Garden Recipes